This post is very straightforward: how to make a pinback button, in this case, a Pinda.
Tools & supplies
Front row (L to R): Button press, rotary cutter on steel cutting board, art designs
Back row: Bags of pin shells, clear mylar (tiny bag), pin backs, completed pins

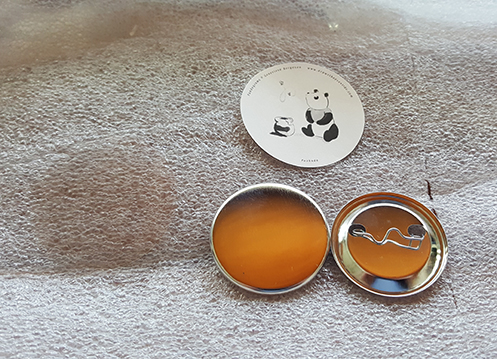
The smaller photo is a close-up of the 4 pieces of a pin: mylar (the circle that’s darker than the rest of the background foam), art, pin shell, & pin back.
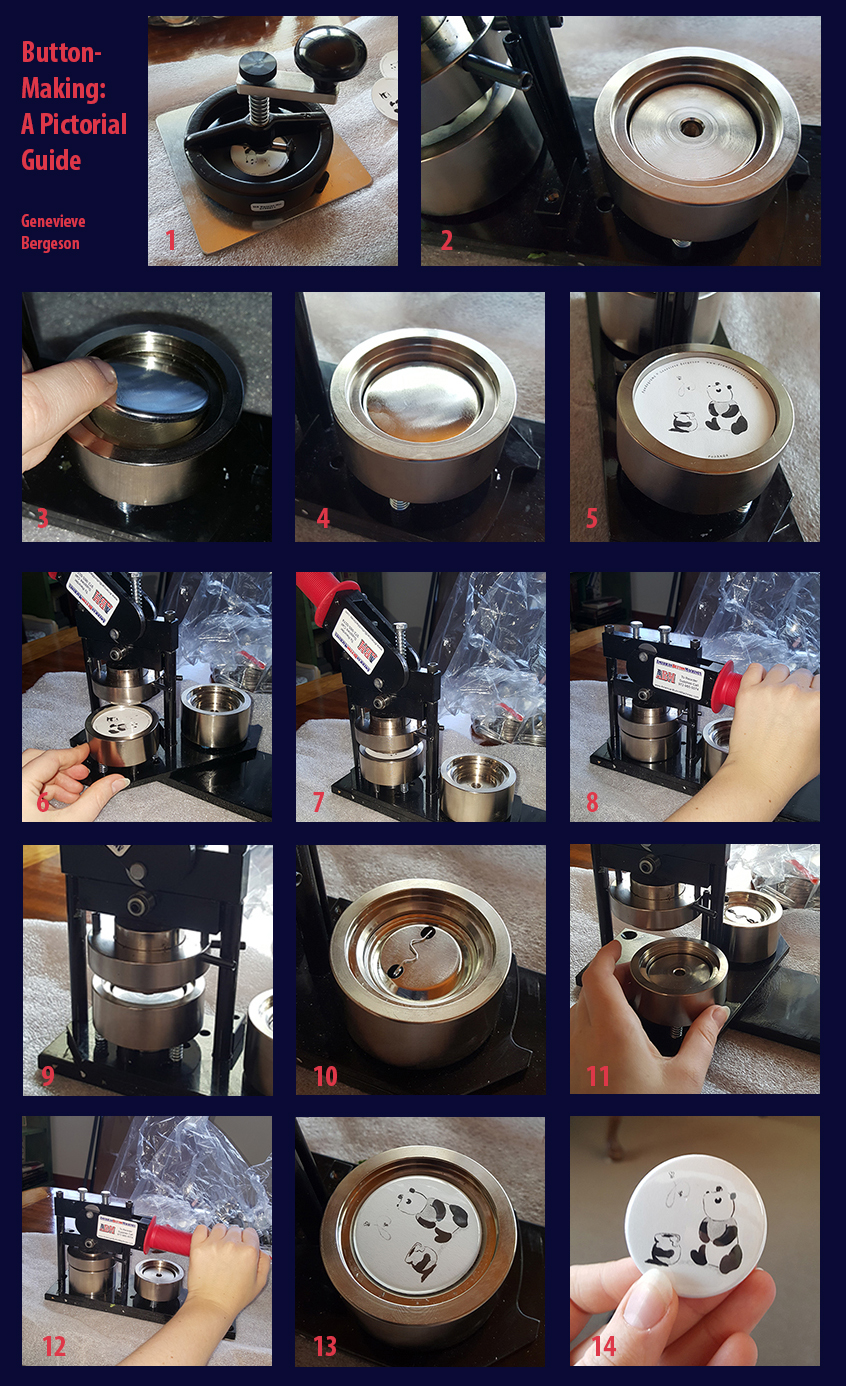
Ready to make a button? Here are the steps with a visual guide.
- Cut artwork in a circle. (You can use a dial cutter or scissors.) The circle needs to be a bit bigger than the final diameter of the button because it will curve around the edges of the shell. (I had some pandas already cut into circles, so I skipped this step when I took the demo photos.)
- Swivel base of button machine so shallow die (“pot” or “dish”) is accessible.
- Put pin shell face in shallow die.
- (Ditto)
- Put artwork on shell, then clear mylar.
- Rotate base of machine so shallow die is under press.
- (Ditto)
- Grasp handle & press down. This will press the shell, picture, & mylar together.
- When you release your, it pick ups the pressed pin front.
- Place pin back in deep die. Make sure squiggly side is up so that when the pin is pressed together, the straight latch of the pin is on the back of the pin. The squiggle will be inside the pin. (You can’t undo a pin press if you put the wrong side up.)
- Rotate base of machine so deep die is under press.
- Grasp handle & press down. This presses the pin front & back together.
- Release. This drops the new pin into the die. Rotate base again so you can take out the pin.
- Ta-da-!
Neat ;<} Thanks for the demo!
Love,
Dad
You’re welcome.