Special Recognition: LST Animals 2018

This week, Light Space & Time Online Art Gallery announced the results of its May 2018 “Animals” contest, and my oil painting, Bluesy Coda, was accepted in Special Recognition in the Paintings & Other Media category! (Special Recognition is a subcategory different from the overall Special Merit category.) More than 700 pieces of art were submitted. Be sure to browse the exhibit — there are many fine pictures.

Links

Animals 2018 Exhibition main page: www.lightspacetime.art/animals-art-exhibition-may-2018-2/

Painting & Other Media page: www.lightspacetime.art/animals-2018-art-exhibition-painting-other-media-category/

(Scroll down to find a puppy you might recognize. Artwork is arranged alphabetically by the artists’ surnames, so it’s near the top of the “Special Recognition Artists” section.)

LST’s Youtube page, which has video slideshows of all the exhibition categories: www.youtube.com/user/LightSpaceTime

Presidential Cabinets: Part II

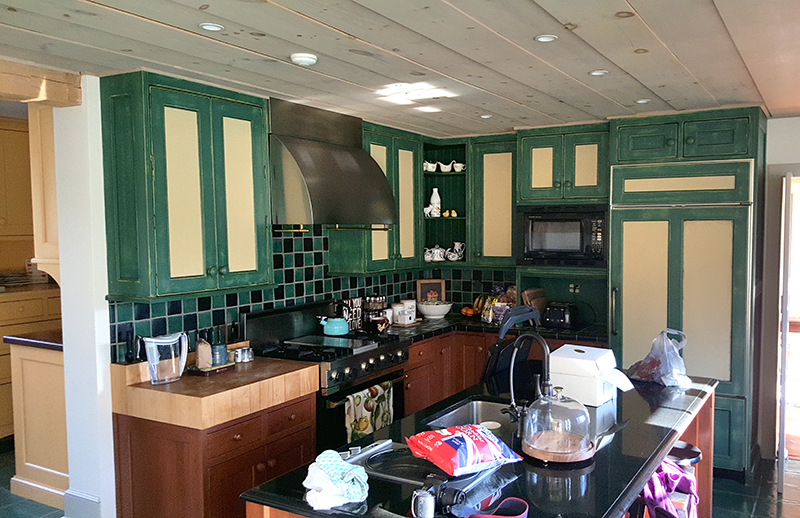
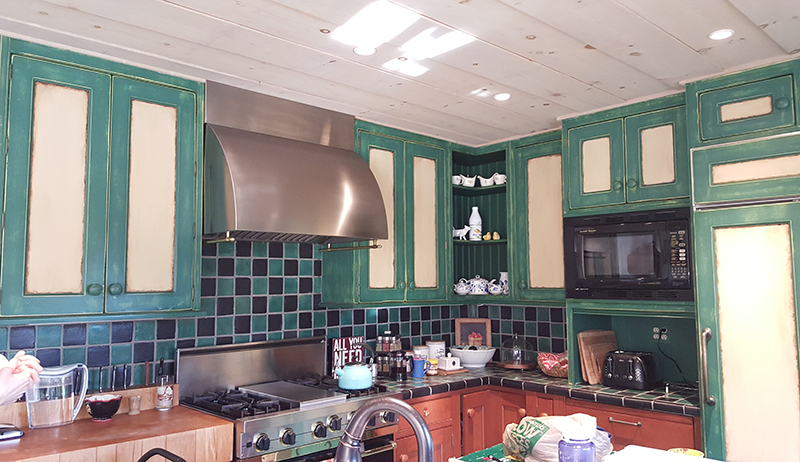
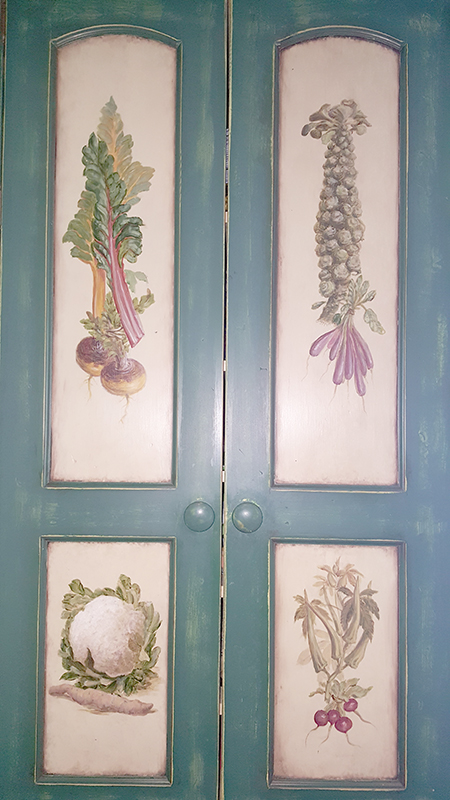
The first step to take these cabinets from solid green to simply gorgeous was to paint a base color on the inset panels. Arguably that’s actually the third step–the first being to pull a selection of paint chips from a hardware store and the second to compare them with the background on the vegetable panels already there. I chose a neutral, yellow-toned interior flat paint. (I used a single sample size from Home Depot.) There was no need to sand or prime. I just grabbed a wide brush and started painting.

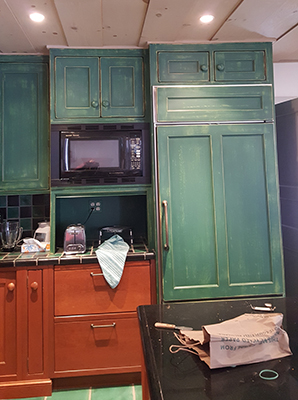
It took 4 to 5 hours to paint all the cabinet panels. The cabinets in the above photo (click to enlarge) were painted in the same day (Jan. 20). The following week, it was decided that we should also paint the two  little panels above the fridge (above the long horizontal panel on the right). With the exception of one panel, these have only 1 coat of the yellow paint. I did a side-by-side comparison–1 panel with 2 coats & its neighbor with 1 coat–and, really, 2 coats of paint did not contribute anything to the look. In fact, letting a little green show through (1 coat) contributed to the rustic look.

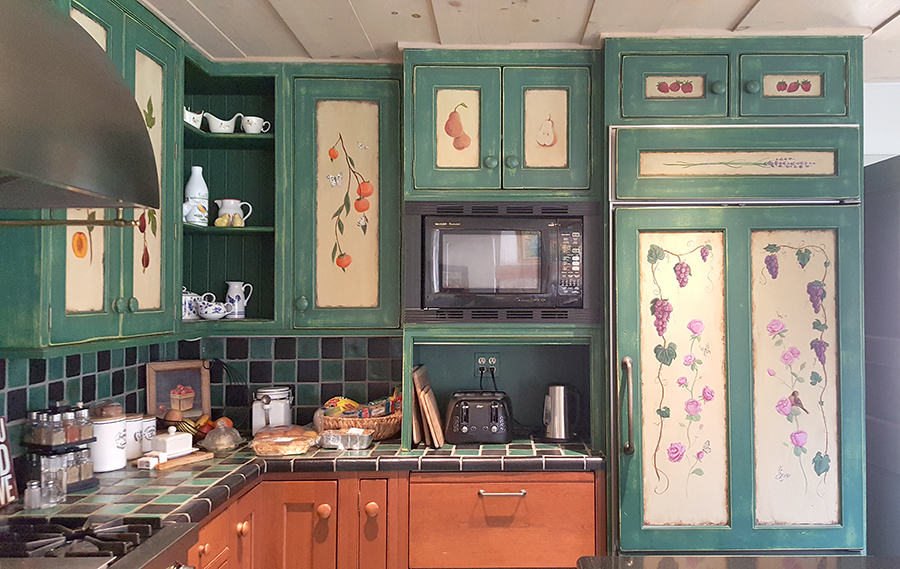
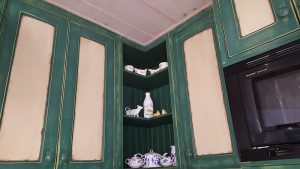
After the yellow base coat dried, I set about to age the paintings. I experimented with this on 1 panel before leaving for the day (Jan. 20, the base coat day), knowing that I wanted to have a plan ready for the following weekend when I returned to age all the panels.

The above effect was achieved with a simple mix of acrylic pigments, mainly burnt umber (with dashes of white, black, and a light beige neutral called “unbleached titanium,”) with varying amounts of water for different transparencies of color. The darkest areas had little to no water & the lightest, smudgiest areas the most. Ultimately I stopped using the white & the unbleached titanium and stuck with the umber. The technique? A mix of dabbling, dry brush, and smearing with a rag. Satisfied with the look, I set out until the next Saturday (Jan. 27). Marissa joined me at that time, and it took us about 4 hours to age the rest of the panels. (That’s 8 hours between the two of us!)

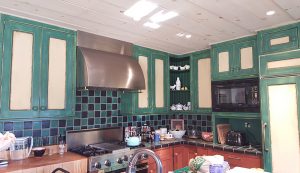
Ta da! The kitchen already looks lighter.

Presidential Cabinets: Part I

Do you remember that my preview of upcoming topics (posted back in February) mentioned that there would be posts about painting cabinets with a friend? If so, cool. If not, hakuna matata–here come a lotta!  After many months, I am grateful to announce that this joint venture with fellow artist & co-worker Marissa Bunting (also a Principia art major) was completed a week ago today. After sorting through hundreds of pictures (no joke), I’m ready to show you how we went from this

–to this!

We painted 2 other cabinets not pictured here, but you will see them in future photos. The kitchen is quite large, so it’s tricky to get all the cabinet fronts in one photo. 

Wondering about the title of this post? This kitchen is in the home of the president of the organization where I work, so, you know, presidential cabinets. (Never pass up a good pun!) The building itself was purchased within the year (September 2017, I think–the current residents didn’t move in until the end of December or January). The cabinets were custom-built for the house and most of them were solid green. The president’s wife suggested the project to help lighten the room and also finish a project that was already started. One side of the kitchen already had cabinets painted with various vegetables. For example:

Why not finish the project with colorful fruit & flowers? Why not check back next time to start reading about how we did it? 😉

How to Make a Pin(da)

This post is very straightforward: how to make a pinback button, in this case, a Pinda. 

Tools & supplies

Front row (L to  R): Button press, rotary cutter on steel cutting board, art designs

Back row: Bags of pin shells, clear mylar (tiny bag), pin backs, completed pins


The smaller photo is a close-up of the 4 pieces of a pin: mylar (the circle that’s darker than the rest of the background foam), art, pin shell, & pin back.

Ready to make a button? Here are the steps with a visual guide. 

  1. Cut artwork in a circle. (You can use a dial cutter or scissors.) The circle needs to be a bit bigger than the final diameter of the button because it will curve around the edges of the shell. (I had some pandas already cut into circles, so I skipped this step when I took the demo photos.)
  2. Swivel base of button machine so shallow die (“pot” or “dish”) is accessible.
  3. Put pin shell face in shallow die.
  4. (Ditto)
  5. Put artwork on shell, then clear mylar.
  6. Rotate base of machine so shallow die is under press.
  7. (Ditto)
  8. Grasp handle & press down. This will press the shell, picture, & mylar together.
  9. When you release your, it pick ups the pressed pin front.
  10. Place pin back in deep die. Make sure squiggly side is up so that when the pin is pressed together, the straight latch of the pin is on the back of the pin. The squiggle will be inside the pin. (You can’t undo a pin press if you put the wrong side up.)
  11. Rotate base of machine so deep die is under press.
  12. Grasp handle & press down. This presses the pin front & back together.
  13. Release. This drops the new pin into the die. Rotate base again so you can take out the pin. 
  14. Ta-da-!


Presenting Pindas!

As promised in my previous preview post, I am pleased to present Pandagram Pindas! Even more petite than the original card set, these are pin-back buttons featuring all 11 of the current Pandagram antics. (7 are pictured here.)

They are simple pin-back buttons, like any old “I Voted” or “Save the Whales” buttons. Pindas are 1.75″ in diameter. That’s the size kit I bought from American Button Machines; they have other sizes, but I thought 1.75″ was best for these. Any smaller would be too close to the sticker size, and too much bigger would get them close to the card size.

From the time I participated my first anime artist’s alley (back at Kawa Kon 2015), I noticed that many artists and vendors sold pins. At the time, I was not particularly interested in pin-making, but I did take note that more people were more apt to purchase small items than a big poster or art print, and buttons were a hot item in that category. (The next time around, I made sure to have a small item: Pandagram stickers in 2 designs.)

Then, a year ago November, I attended Anime Iwai in Florida and met a gal who happened to have a pin-making machine right at her booth! I asked her about it, and she showed me how to make a button. It’s quite simple once you have the right equipment. Perhaps next time I’ll post a tutorial on how to make buttons.